Sunday, March 27, 2011

Water Storage For The Ages

Water is an essential part of Food Storage and Emergency Preparedness.  Without water you will die within 48 hours.  Without continued clean water we die within two weeks. 


Basic Water Storage
Store water in juice jugs, 2 liter soda bottles, and 55 gallon blue barrels.  DO NOT STORE WATER IN THE GALLON JUGS THEY ARE SOLD IN AT THE STORE!!!!  You know the ones like milk jugs.  Also, do not store your water directly on or against concrete.  The chemiclas in the concrete will eat through the plastic and the water will take on the flavor of the cement (or anything it's stored by).  They say the blue barrels can go on cement but I still stick a scrap piece of wood or a few layers of cardboard under mine.

The goal, as set by leading preparedness expert Tim Woolf, is to have one 55 gallon barrel per person in your family.  In reality, after drinking and cooking this may last 2 weeks.  I am working on this and plan on sending each kid packing with their barrel and 400lbs of wheat as they get married.   Until you have a barrel per person, start filling soda bottles.  Then as you get the barrells you can recycle the pop bottles.
You should also have at least 1 gallon in every room in your home in case you are suddenly stuck in that room for an extended period of time (while emergency crews dig through the rubble). 
Treating your stored water is easy.  DON’T.  If you have city water that is pretreated then you do not have to add anything.  If your containers are clean then you shouldn’t have to rotate.  Now please continue reading, don’t stop here or you won’t have the whole picture.
Water Treatment
Like I said in the above paragraph, if you have city water you do not need to treat the water you put in your containers and you don't have to rotate, unless you want to.
The best single thing you can add to your food storage shelf is an under $20 bottle of powdered chlorine!  One bottle will clean enough water to supply your entire block with water for a month or more.  If 15 families in our ward had these then the entire ward would be set for several months.
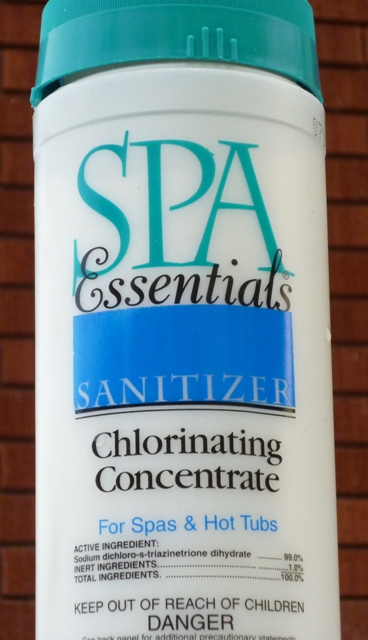
To use this all you do is add ¼ teaspoon (let me repeat) 1/4 TEASPOON to a 55 gallon barrel of water from a good source (I’ll expand on that in a moment).  Put the lid on and let it sit for 24 hours.  If you want the chlorine smell and taste gone then let the barrel sit for another 24 hours without the lid.  Do the math:  1 barrel with chlorine/lid on, 1 barrel lid off, 1 barrel being used.
The limitation of this is it only kills biological contaminants.  It doesn’t cleeeeean the water.  Unless you know your water source is clean of non biological contaminants you also need a good filter that will take out the dirt, petroleum (gasoline/oil) and  the radioactive dust (I know you were thinking it).

Water Filtration
There are chemical filters, micro pour filters, bio sand filters, and any other kind of filter you can dream of.  Some very, VERY expensive and others homemade with stuff you can buy at the hardware store for a few dollars.
One of the best filters you can buy is the Aquarain.  It uses gravity and ceramic filters to purify up to 25 gallons a day.  The water needs to be free from debris but the filter will take everything else out. If you are interested go to their website at http://www.aquarain.com .  I also have a lady out of draper that buys these in bulk so she might have a better price.  Her email is preparednessproducts@comcast.net .  There is a problem with these:  The ceramic filters are extremely fragile.  One tiny crack and the filter is useless.

An awesome filter you can make at home is a sand filter.  It’s like taking the city’s water treatment plant and putting it in a Rubbermaid garbage can, or even a 5 gallon bucket.  Here is a basic diagram of a sand filter.  You can also look up videos on Utube.  OR if we have enough interested people, we can make this a ward activity.  The only thing I would add to my filter is a layer of “activated carbon” that you can buy at any pet store with a fish isle.


In Short
Start with filling the two liter soda bottle from family parties and stuffing them in the back of closets.  Then add blue barrels.  Then add a filter, or learn how to make one.   In an emergency (like Katrina or Japan) Start using your stored water while you collect water to start filtering:  you filter out the big stuff (a friend said “pick out the body parts” ewww!), send the water through your filter and then chlorine it to heck.


Thursday, March 17, 2011

Wheat Sprouts

I recieved a great comment from Lisa saying that she was able to sprout some old canned wheat.  I'm so glad!  I was told that wheat canned with an oxygen absorber wont sprout.  I worked with a lady at the cannery who said her canned wheat would not sprout.  I'm not sure what the discrepancy is but if you have had experience with sprouting canned wheat (or any and all experiences with wheat sprouts) I would love to hear from you!  brendaburrup@q.com  -if you're curious, I store my wheat in buckets.


Why sprout your wheat?  It makes the wheat more nutritious and esier to digest because it breaks down the gluten, which is what our bodies have a hard time with.  Celiacs should NOT eat wheat berries, sprouted or otherwise.

I'll do a post on how to sprout but if you can't wait then simply google "wheat sprouts".  You will find hundreds of uses and recipes.  I dry the sprouts at a low temperature in my dehydrator and then I use my manual grinder to turn it into a course flour that I add to my breads.  Sprouted wheat has lost it's gluten so it can't be used as a bread flour on it's own.  I add about 1/4 to my dough, or you can research gluten free baking to find out how to make breads without regular wheat flour.  It adds a delicious, nutty flavor.  Mmmm.


Wheat grass is different.  Amazingly nutritious and medicinal, it is so easy to grow at home! A container, some dirt or pete moss and vwala! Wheat Grass!  It can be added to smoothies, or just muched on when you're felling a little bovine-ish.  Usually it is juiced.  You can buy just the juice at healthfood stores.  Anne Wigmore uses it in everything at her health spa on the east coast.  There are some great books about wheat grass and its medicinal qualities and all the different ways you can use it.  CELIACS I've known do fine with wheat grass.  I think of it as aloe vera without the slime.

Monday, March 14, 2011

Community Gardens, 2 Options

We have a ward community garden and North Ogden has a city community garden. 
Ward Garden
The ward community garden is our front yard.  We have no plans on landscaping this wonderful, east facing yard for several years so it might as well be put to some use.  It has sprinklers and a water spigot for easy water access.  It is also on private property in a secluded neighborhood, which is nice.  The ward community garden has pleasant property owners that promise not to bug you while you garden.  You are welcome to make your garden plot as simple or as ornate as you want.  You can also have as much, or as little, space as you need – depending on how many families request a piece of the pie. 
Terms and conditions:  the only drawback is that you are responsible for digging up the dirt, or setting up your own raised garden bed and supplying your own dirt.

Call or type if you are interested:  Brenda at brendaburrup@q.com or 801-737-7339.

North Ogden City Garden
The city’s community garden is located on an empty lot behind the city office buildings at 2550 North 550 East.  The person in charge of that garden is Lori Frasier, 737-0587.  She is taking a list of interested citizens.  The city is planning on setting up 4’X4’ raised garden beds for individual families.  They are currently talking to local businesses hoping to get help with set-up.  It has water and has plenty of sun, even with the giant pine tree.


Saturday, March 12, 2011

Forever Food Storage, Never Rotate, Butter

The next few posts will be things that once you store correctly, you never need to rotate.  They can sit on your shelf until your great-great-grandkids find it and wonder what other crazy things you have on your shelves.

Oil is such an important part of food storage.  It has been told that during WWII those on the run, or those suffering in consentration camps, craved butter.  Fat feeds your brain and regulates hormones. 

Clarified, canned butter, also know as Ghee, is perfect.  A healthy oil that is choleserol free. Once stored correctly it will never go bad.  It will be priceless if, when, we have to rely on our food storage.
Clarified butter is really soft and sort of grainy when cool.  It melts at a lower temperature (70 degrees) but othere than those differences it can be used just like everyday butter/margarine.  It smells delicious, but doesn't have a lot of flavor so I like to add a little salt when I use ghee.


You can buy commurcially prepared butter, but it is expensive and just as easy to do at home.  Set a goal to can 1 lb. of butter a week until you have a couple of gallons.  I'll tell you about other oils to add soon. 


The instructions follow.  Be patient with yourself.  You might mess up a couple of times.  It's okay.


Materials needed:        
ü Heavy bottomed pot with tall sides because the butter splatters some as it boils. 
ü 1lb of butter.  I use unsalted but have been told it doesn’t matter.  The actual instructions say to use “organic butter from pasture fed cows” but I think $1.50 butter works just as well as $5.00 butter.
ü Cheese cloth or a fine, wire strainer
ü Container to store your butter.  Any clean container with a lid will work.  This does NOT need to be sealed like other canned foods.  I use an empty mayo or peanut butter jar that has been cleaned out real well and is completely dry.  I just add the next layer until it is full.

Instructions:        
v Put the butter in the pot and place it on the burner.  Turn the burner on to its lowest possible setting that will still melt the butter.  Mine is the “R” on WARM. 
v Set your timer for 50-60 minutes.  It will take trial and error to know how long it takes.  Too short and it wont set up, too long and it is ruined.
v DO NOT STIR, AT ALL.  White, foamy, yuck will rise to the top and gritty stuff will sink to the bottom.  This is the stuff that you’ll strain off in the end. 
v You know it is done when the white, foamy, yuck turns gold and crispy.  Brown and crispy is a sign of over done.  Everything needs to be a beautiful golden yellow color. 
v Slowly pour contents through several layers of cheese cloth or through your fine wire strainer.  The oil is VERY, VERY, VERY HOT so be sure you strain it into a container that can handle the heat until it has a chance to cool down.  Let it cool down at least 1 hour before pouring it into any plastic container. 
If you have questions or would like a demonstration please call:
Brenda Burrup, brendaburrup@q.com

Wednesday, March 9, 2011

What to do with a Wheat Berry.

Whole Wheat Pilaf:
  • 2 Cups whole wheat, wash several times then
  • Add 6 Cups of cold water, let stand in cool place for 24 hours
  • Cook in crock-pot for 10-12 hours then
  • Melt ¼ lb butter in a skillet and
  • Add 1 large onion, chopped fine
  • Simmer for 30 minutes, do NOT brown
  • Add to wheat and cook for 2 more hours
Makes a lot, very tasty and keeps in freezer well.
You can freeze it in portions and add it to casseroles with, or instead of, meat. 

Seed Sale at IFA

Corene just informed us that IFA is selling seed packs 10 for $1!!!!!!!!! Sale goes through March 15.  I know where I'm headed tomorrow.

Tuesday, March 8, 2011

Wheat! I Had No Idea!


Kamut and Spelt are the originals
They are the same today as they were 3,000 plus years ago.  Purists only use these two because they have not been genetically altered, that also makes them more expensive.  I have been told that these two are easier to digest.

Red and White Wheat
These are available from the Dry Pack Cannery for about $8.00 per 25 lb bag.  Most common question at the Cannery:  “What is the difference between Red and White wheat?”  You seem to get more flour from the White wheat but when it comes to taste I found that some people were really passionate about their Red (heavy and lots of flavor) and some about the White (lighter, more pastry like).


A Year’s Supply of Food for Under $10.00
One 25lb bag of wheat IF SPROUTED will keep a person alive for 1 year.  That’s eating less than ¼ cup of sprouts a day.  If you haven’t done any long term storage and your goal is to get a year’s supply then start by going to the cannery and buying one bag of wheat for each person in your family and learn how to sprout.  Then you can honestly say you have enough to keep you alive for a year BUT BY ALL MEANS KEEP ADDING TO YOUR STORAGE!

Suggested Reading
The Sprouting Book by Ann Wigmore.  ISBN 0-89529-246-7.  I feel any family that stores whole grains for a time of scarcity should have this book with their supplies even if they don’t read it until that day comes.


Storing your Grains
The Church recommends storing your grain in different ways.  Here are the most common.
Cans:  You can go to the cannery and seal your grains in #10 cans with oxygen absorbers.  This is great and virtually impervious to any elements but your grain will also be unsproutable.
Buckets:  The only thing I really do is put about a cup of salt in a brown paper bag in the center of the bucket to help absorb any moisture that might be in the air.  If you are worried about bugs (weevils eat the wheat germ also rendering your wheat unsproutable, but they are protein J ) you could add diatomatious (sp?) earth to your bucket or I have heard of people lining the bottom and top of their buckets with bay leaves. 


Amount to Store
The Church recommends:  400 lbs of grain:  wheat, corn, rice, oatmeal, etc. per person.
If you ration this out that might give you enough wheat for a dinner roll every day. 
Survivalists recommend:  400 lbs of wheat per person and then storing different grains in addition.  This, rationed out, will give you enough wheat for a small loaf of bread per person per day and adding different grains gives you more energy.


Friday, March 4, 2011

Time to Prune


‘Tis late winter and that means pruning season.  Whatever you are pruning, fruit trees, berry bushes, roses or any sort of bush, you can get free instructions on the web.  You can also go to the Stake Peach Orchard, they have excellent demonstrations on how to prune their trees and what you learn can be applied to what you have in your yard.  It is also my understanding that we have some amazing gardeners in our ward.  I’m too new to know who they are so I’m hoping you will respond and tell us who we might call for some more personal advice.  I am always happy to come and offer my amateur tips.
I love pruning.  It is so helpful for the plant and it is a miracle that cutting away parts of a plant actually make it stronger and more beautiful.  I also love that it’s kind of hard to mess up too bad.  Plants are usually very forgiving and you can ALWAYS learn from your mistakes and try again next year.
Don’t have the time to research?  Tip 1:  Leave space for the fruit, if you have branches too close together to let the fruit grown properly then get rid of one of the branches.  Tip 2:  Can you reach the fruit?  Unless the tree is old or already taller than you, you can cut the little branches within reaching distance.  Tip 3:  Drive the neighborhood and see what they should look like.  I love driving down 700 East between 3100 and 2700 N.  There are fruit trees and berry bushes getting pruned right now close enough to the road for all to see.

Wednesday, March 2, 2011

March's focus: FOOD STORAGE

"Organize yourselves; prepare every needful thing, and establish a house, even a house of prayer, a house of fasting, a house of faith, a house of learning, a house of glory, a house of order, a house of God" (D&C 109:88)

This month we are going to sort of focus on food storage, but we'll talk about anything and everything that YOU want to talk about.  We have a canning date at the Ogden Home Storage Center on Saturday, March 19, at 1pm.  We have 1 station for 1 hour, but things have been so slow there that we can probably stay longer or take another station if we need to.

I worked in the office of that cannery every Saturday for a year during the last "panic".  It was so much fun and easy.  If you've ever wanted to serve a mission close to home on your schedule then the cannery is a great place.

If you go to providentliving.org and follow the links to food storage order form then you can see the offerings at the cannery.  Some of the tasty favorites are the apple slices and hot cocoa.  If you want some products then fill out the order form and give it to me with a signed, blank check.  It needs to be blank because they are sometimes out of some things or their prices change without notice.  I've done this a lot and can tell you that blank checks are by far the easiest and most efficient way to do this.  You get copies of all receipts so you know I've been honest.

For the record, I'm new to blogging, so .  . . be paitent and participate.  Send me any pictures and posts you would like to add.  Or you can just comment under the post.  Also, if you have anything around the house you want to get rid of you can offer it to the ward members here.  We had one of these in our last ward and it was a great success.